Aug 15, 2026
Shop-in-Shop Fabrication: An NYC Retail Build Guide
Shop-in-shop fabrication for NYC retail: host retailer standards, millwork specs, overnight install windows, real budget ranges and a 10-14 week timeline.
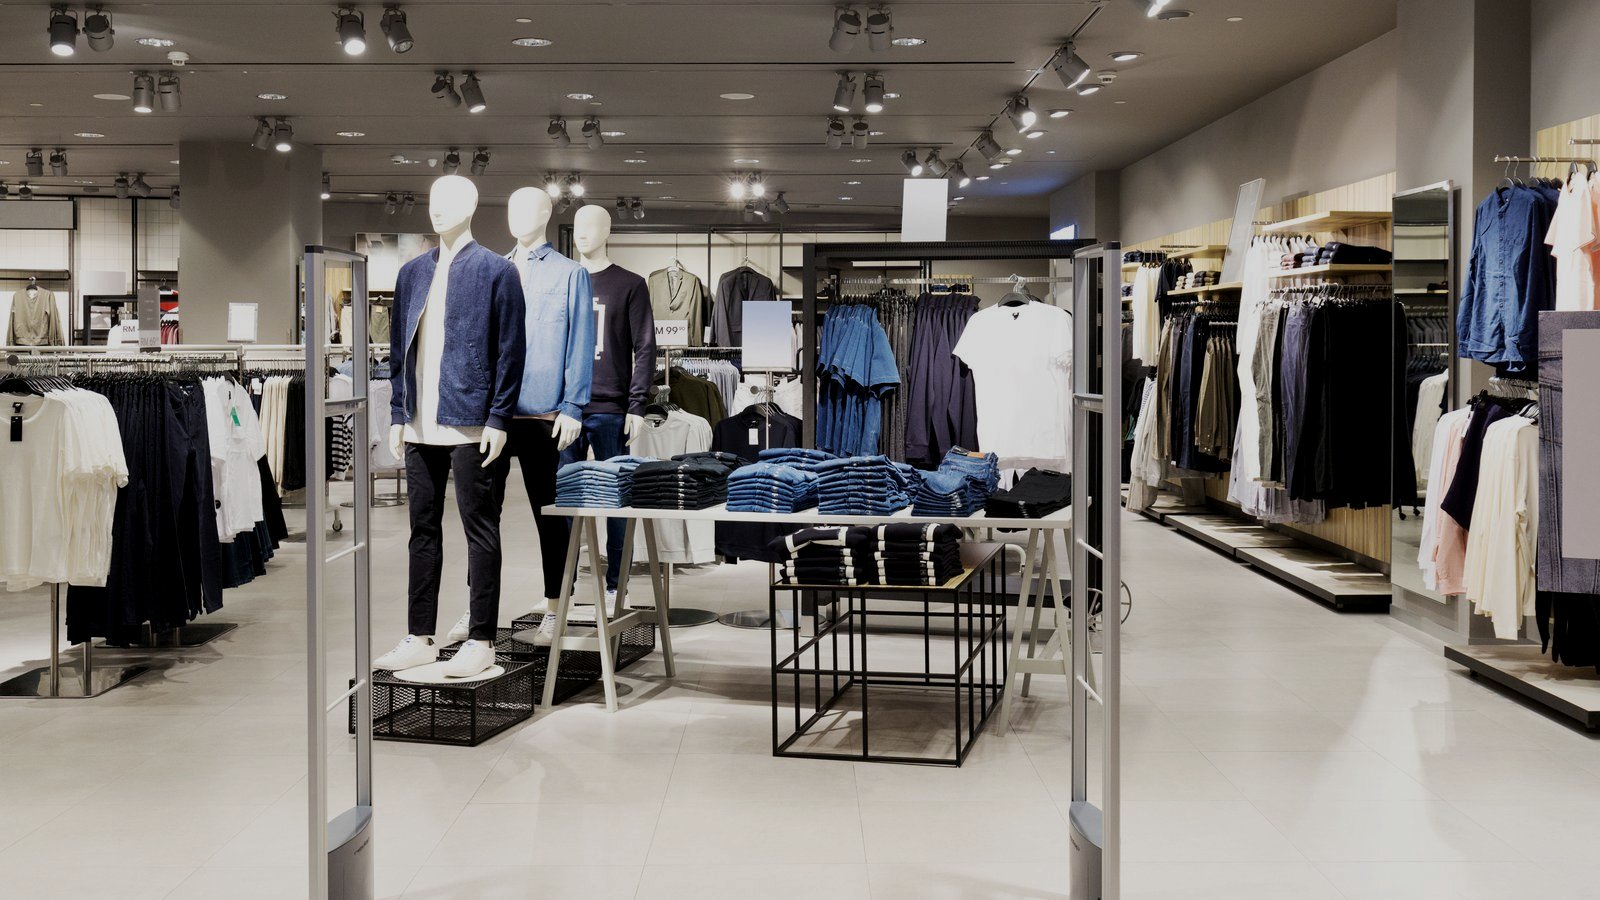
A shop-in-shop is the hardest retail build most brand teams will ever commission, and almost nobody treats it that way. It looks like a pop-up. It is priced like a pop-up. But it lives inside somebody else’s store, under somebody else’s fire marshal, on somebody else’s construction calendar, for eighteen to thirty-six months. Every shortcut you take in fabrication gets seen by the host retailer’s district manager roughly four hundred times before the fixture comes out.
We build these out of our Manhattan shop for beauty, apparel, CPG, and consumer electronics brands landing in department stores, specialty chains, and grocery banners across the Northeast. The work sits between pop-up shop design and permanent store construction, and it borrows problems from both. This guide covers what actually governs the build: the host retailer’s fixture standards, the material specs that survive a retail floor, the overnight install window, the real budget ranges, and the ten-to-fourteen-week schedule that gets you from brief to open.
What a Shop-in-Shop Actually Is
A shop-in-shop is a branded, semi-permanent footprint leased or negotiated inside a host retailer’s selling floor. The brand controls the fixtures, the graphics, the lighting, and usually the merchandising standards inside a defined envelope. The host retailer controls everything else: the floor, the ceiling, the power, the aisle widths, the install window, and the right to tell you to change any of it.
Footprints typically run 80 to 600 square feet. Anything under about 80 square feet is really an endcap or a floor fixture program. Anything over 600 starts behaving like a leased department with its own construction drawings and a general contractor. The sweet spot for a first program is 150 to 300 square feet — enough to hold a perimeter wall, a mid-floor merchandising table, a demo or service position, and a photo-worthy focal moment.
How it differs from a pop-up
A pop-up runs four days to twelve weeks and is engineered to be struck. A shop-in-shop runs eighteen to thirty-six months and is engineered to be cleaned. That single difference drives most of the fabrication decisions in this guide. A pop-up can use foam-core substrates, tension fabric, and adhesive vinyl on wall surfaces. A shop-in-shop cannot — those materials look tired in six weeks under a retail floor’s traffic and cleaning regimen. Our Primark holiday pop-up build is a good illustration of the temporary end of the spectrum: fast install, high-impact, engineered for a defined run and a clean strike.
How it differs from permanent store construction
Permanent construction is built in place by trades, permitted as an alteration, and inseparable from the building. A shop-in-shop is manufactured off-site as a kit of parts, delivered on a truck, and assembled by an install crew in a single overnight. Nothing gets welded, cut, or wet-finished on the sales floor. If your design requires site fabrication, it is not a shop-in-shop — it is a build-out, and it needs a different contract, a different permit path, and a different budget.
The Host Retailer Controls the Spec Sheet
Before a designer sketches anything, get the host retailer’s vendor fixture standards package. Every major banner has one. It is usually a 20- to 60-page PDF, it is usually out of date in at least one section, and it is always binding. Ask for it in writing and ask when it was last revised.
The clauses that most often kill a design after it has been approved internally:
- Maximum fixture height. Typically 54″, 72″, or 84″ depending on sightline policy. Some banners cap mid-floor fixtures at 48″ to preserve store-wide visibility for loss prevention.
- Floor loading. Usually expressed in pounds per square foot. Upper-level selling floors in older Manhattan buildings can be as low as 75 psf. That number governs whether you can use stone, terrazzo, or a hydraulic element.
- Attachment restrictions. Most banners prohibit any penetration of floor, ceiling, or demising walls. Your fixture must be free-standing and self-ballasted, which changes the base construction entirely.
- Flame spread rating. Class A finish (ASTM E84, flame spread 0–25) on all vertical surfaces is the common requirement. This eliminates a lot of decorative laminates and most untreated fabrics.
- Electrical. Whether you may tie into house power, whether you need a licensed electrician from the retailer’s approved list, and whether cord-and-plug is permitted at all.
- Approved finish palette. Some banners restrict wood tones or metal finishes to keep the floor cohesive. Rare, but it exists, and it is not negotiable when it does.
Read the standards package before the creative brief goes out, not after. Retrofitting a design to a 48″ height cap after client approval costs three weeks and roughly 15% of the fabrication budget in redrawn shop drawings and re-engineered bases.
Site Survey: Measure Before You Design
The retailer will give you a floor plan. The floor plan will be wrong. Not maliciously — store plans drift as fixtures move, columns get furred out, and HVAC gets rerouted. Send someone to the actual store with a laser measure and a camera before anything goes into CAD.
What to capture on the survey:
- Finished ceiling height at four corners of the footprint, plus the lowest obstruction (sprinkler heads, diffusers, lighting track, structural beams).
- Floor flatness across the footprint. Anything beyond 1/4″ of variance over 10 feet means leveling feet on every base, not just corners.
- Existing lighting track position, circuit, and whether the retailer will let you add heads.
- Nearest accessible outlet and its circuit capacity. Photograph the panel schedule if you can get it.
- Path of travel from loading dock to footprint: door widths, elevator car dimensions and weight capacity, turn radii, threshold heights, and any stairs.
- Adjacent brand fixtures — height, finish, and lighting temperature — so yours reads as intentional rather than mismatched.
The freight path is the one people skip and the one that ruins install nights. A 96″ tall perimeter wall panel does not fit in a 90″ freight elevator car, and there is no clever solution at 2 a.m. Break panels at dimensions that clear the smallest opening on the route, with two inches of margin. This is the same discipline that governs our experiential design work in constrained NYC venues, where the building dictates the design more than the brief does.
Materials and Construction Standards
Retail floors are abrasive environments. Carts hit bases, shoppers lean on ledges, cleaning crews run wet mops along kickplates nightly, and merchandisers reposition product every week for the life of the program. Specify accordingly.
Millwork and casework
Use 3/4″ NAUF plywood or 45-pound industrial particleboard core for cabinet bodies — not MDF for anything within 12″ of the floor, because MDF wicks water from mopping and swells at the edge within a season. Face with high-pressure laminate (HPL) at 0.048″ vertical grade minimum, or thermally fused laminate on flat panels only. Edge-band with 3mm PVC, not 0.5mm tape; the thin stuff peels at the corner within four months of cart contact.
Toe kicks take the worst abuse. Specify a stainless or anodized aluminum kickplate, 4″ high, on any surface that faces an aisle. It adds roughly $18 to $28 per linear foot and eliminates the single most common warranty complaint on retail fixtures.
Metal
Structural frames run 1″ or 1.5″ square tube in 14-gauge steel, powder-coated after fabrication. Powder coat, not wet paint — a wet-painted frame will show chips at every fastener within a year, and touch-up on a retail floor is not permitted during store hours. For merchandising arms, brackets, and anything a customer touches, 16-gauge is adequate and saves weight, which matters when your ballast calculation is fighting a floor loading limit. The structural logic here is the same as our trade show fabrication work: engineer the frame for repeated assembly and handling, not just for the static load.
Finishes and graphics
Avoid painted MDF wall surfaces entirely on a program running past twelve months. Use HPL, back-painted glass, solid surface, or powder-coated metal panels. If the design requires a painted look, spec a catalyzed conversion varnish over a primed substrate and accept that it will need a touch-up visit at month twelve.
Graphics should be replaceable without touching structure. Build every graphic position as a captured panel in an aluminum retainer, a magnetic mount, or a slot-in rail. A brand will change its campaign creative two to four times over a three-year program, and the difference between a $400 reprint and a $4,000 fixture rebuild is entirely a decision you make in shop drawings.
| Element | Pop-up spec (≤12 weeks) | Shop-in-shop spec (18–36 months) |
|---|---|---|
| Wall substrate | Foam-core, Sintra, tension fabric | 3/4″ plywood core with HPL face |
| Edge treatment | 0.5mm tape or exposed edge | 3mm PVC band or aluminum extrusion |
| Frame finish | Wet paint acceptable | Powder coat, post-fabrication |
| Graphics | Adhesive vinyl, direct print | Captured panel in retainer, replaceable |
| Base detail | Painted kick | Stainless or anodized kickplate |
| Lighting | Plug-in fixtures, exposed cord | Integrated LED, concealed wiring, driver access panel |
Lighting, Power, and Data
Retail lighting is where brand fixtures win or lose against the surrounding floor. Most department stores run ambient light at 3000K to 3500K. If your integrated fixture lighting is 4000K, your product will read cold and clinical against everything around it. Match the host’s color temperature within 200K and beat their vertical illuminance by 30% to 50% — that contrast is what pulls a shopper’s eye across the floor, not raw brightness.
Specify a minimum CRI of 90 for apparel, beauty, and food. At CRI 80 — still common in generic strip fixtures — reds go dull and skin tones go gray, which is fatal for cosmetics. Drivers should be accessible from the front or a service panel, never from behind a fixed panel that requires disassembly. A failed driver at month fourteen should be a fifteen-minute service call, not a night crew.
Assume every powered component will fail once during the program. Design the access panel before you design the elevation.
If the footprint includes a screen, a tablet, a sampling dispenser, or any connected component, resolve the network question early. Most retailers will not put a vendor device on the store network. Plan for cellular connectivity with a signal test at survey — department store interiors, especially below grade in Manhattan, are frequently dead zones. Interactive elements carry the same integration demands as our immersive production builds, where content, hardware, and enclosure have to be engineered as one assembly rather than three deliveries.
The Install Window Is One Overnight
Host retailers do not close selling floors for vendor fixtures. You get one overnight, typically 10 p.m. to 6 a.m., sometimes 11 p.m. to 5 a.m. In that window a crew must receive the truck, move everything up from the dock, assemble, level, light, merchandise-ready the fixture, clean the area, and remove all packaging and debris from the building. Nothing may remain in the stockroom.
What that constraint means for fabrication:
- Dry-fit the entire fixture in the shop. Full assembly, lighting energized, graphics installed. Every unresolved shop problem becomes a store problem at triple the cost and one-third the time.
- Number every part and every fastener bag to match the install drawing. Crews assembling at 1 a.m. do not read paragraphs.
- Standardize hardware. One driver bit for the whole build if possible. Two maximum.
- Ship in a rolling crate that clears the freight elevator and can be broken down flat for removal in the same window.
- Pack a strike kit — touch-up laminate, matching caulk, spare fasteners, a spare LED driver, and felt pads.
- Photograph the completed install before the crew leaves, from four angles, and send it to the brand and the store manager before 6 a.m.
Budget 1.5 to 2 labor hours per 10 square feet of footprint for a well-drawn kit, plus two hours of fixed overhead for receiving and cleanup. A 200-square-foot shop-in-shop is a four-person, six-hour night. If your math says otherwise, your kit is not resolved. This is the same install discipline that governs overnight hospitality builds like our Magic Hour Mountain Lodge at Moxy NYC project, where the venue could not be taken offline for the build.
Budget Ranges and What Drives Cost
Shop-in-shop fabrication in the New York market prices between $180 and $600 per square foot of footprint, fabrication and install included, excluding creative and excluding any fee the host retailer charges for the space. The range is wide because the drivers are not the ones brand teams expect.
| Footprint | Typical fabrication + install | What’s included |
|---|---|---|
| 80–150 sq ft | $28,000 – $65,000 | Perimeter wall, one merchandising table, integrated lighting, graphics |
| 150–300 sq ft | $55,000 – $145,000 | Above plus focal moment, demo position, custom casework |
| 300–600 sq ft | $120,000 – $340,000 | Above plus ceiling element, digital integration, seating, engineered structure |
The four largest cost drivers, in order:
- Curves and non-orthogonal geometry. A radiused wall costs 2.5x to 4x a flat one, because it requires CNC-cut ribs, bent substrate, and hand finishing.
- Ceiling elements. Anything overhead triggers structural engineering, seismic or lateral bracing review, and often a separate retailer approval. Add $15,000 to $40,000 and three weeks.
- Multi-door quantity. Counterintuitively, this reduces per-unit cost sharply — see below.
- Digital integration. Screens, players, mounts, cooling, and content management add $6,000 to $25,000 per position once you account for service access and connectivity.
What barely moves the number: finish color, laminate selection within a standard grade, and graphic complexity. Brand teams spend disproportionate review time on those and almost none on geometry, which is where the money actually goes. Our breakdown of event fabrication services covers how these cost structures apply across build types.
Timeline: Ten to Fourteen Weeks
A single-door shop-in-shop with no ceiling element and no custom digital runs ten weeks from approved creative to install night. Add ceiling structure and you are at thirteen. Add a retailer approval cycle that requires their corporate visual team to sign off — common at the larger banners — and you are at fourteen to sixteen.
| Phase | Business days | Output |
|---|---|---|
| Site survey + standards review | 5 | Verified dimensions, freight path, constraint list |
| Design development | 10 | Elevations, renderings, material board |
| Shop drawings + engineering | 10 | Fabrication-ready drawings, load calcs, cut lists |
| Retailer approval | 5–15 | Signed vendor fixture approval |
| Fabrication | 20–25 | Completed kit of parts |
| Dry-fit + QC | 2 | Full shop assembly, punch list cleared |
| Crate + ship | 3 | Delivered to dock |
| Install | 1 night | Live fixture, photographed |
The retailer approval phase is the one that slips, and it is entirely outside your control. Submit early, submit complete, and submit with a dimensioned plan showing clearances to adjacent fixtures — incomplete submissions are the leading cause of a second review cycle.
Multi-Door Rollouts: Design for Repeatability
If the program is going to more than three doors, the design brief changes fundamentally. You are no longer designing a fixture; you are designing a system with a tolerance budget.
The core principle: separate the kit into fixed modules and adaptive modules. Fixed modules — the merchandising table, the graphic wall panel, the demo counter — are identical across every door and get manufactured in a single production run. Adaptive modules — filler panels, base leveling, return-wall widths — absorb the dimensional variance between stores. Aim for 80% fixed by cost. Below 60%, you are custom-building each door and losing the entire economic argument for a rollout.
Per-unit cost typically drops 18% to 22% at five doors, 30% to 38% at fifteen, and flattens around twenty-five. The savings come from tooling amortization, material buying, and shop setup — not from labor, which stays roughly linear. Build one full pilot, install it, live with it for thirty days, then release the production run. Every rollout that skips the pilot pays for that decision across every door.
Ship a printed install guide with each kit: a photo of the finished fixture, an exploded assembly diagram, a parts inventory with quantities, and a two-page sequence. Different install crews in different cities will build your fixture. The guide is the only thing making them consistent. The systems thinking here mirrors what we apply to national brand activations that tour multiple markets under one build package.
Maintenance and the Refresh Cycle
Nobody budgets for this and everybody needs it. A three-year shop-in-shop program should carry 8% to 12% of the original fabrication cost per year for maintenance and refresh. That covers graphic changeovers, LED driver replacement, laminate touch-up, hardware re-tightening, and the inevitable damage from a pallet jack.
Schedule a service visit at month six, then annually. Six months is when installation-related issues surface — a base that was never properly leveled, a fastener that was under-torqued, a graphic panel that was installed with a slight bow. Catching these at six months costs a two-hour service call. Catching them at eighteen months costs a panel replacement.
Hold spares in inventory: one of every unique graphic panel, two LED drivers, a square foot of every finish material, and a full fastener kit. Storage costs almost nothing compared to a rush re-fabrication with a two-week lead time while the fixture sits damaged on a selling floor.
Five Failure Modes We See Repeatedly
- Designing to the floor plan instead of the store. Fixed by a mandatory site survey before design development. Non-negotiable.
- Height cap discovered after creative approval. Fixed by pulling the vendor standards package before the brief goes out.
- Graphics bonded to structure. Fixed by specifying captured, replaceable panels on day one. This single decision saves more money over a program than any material substitution.
- Freight path never verified. Fixed by measuring the elevator car, not asking about it. Break panel dimensions to clear the smallest opening with 2″ of margin.
- No dry-fit before shipping. Fixed by building the full assembly in the shop and clearing a punch list. An unresolved detail costs one hour in the shop and four hours on an install night, if it is solvable at all.
Every one of these is a process failure, not a craft failure. The fabrication is the easy part. The discipline around it — surveying, reading the standards, drawing completely, dry-fitting — is what separates a fixture that still looks intentional at month thirty from one the district manager wants removed at month nine. That discipline shows up in high-visibility retail work like our Celsius pop-up and hospitality builds such as Delilah x h.wood Group, where the finished environment has to survive constant public contact without a maintenance window.
Getting a Shop-in-Shop Built
Bring three things to a first conversation with a fabricator: the host retailer’s vendor fixture standards package, photographs and dimensions of the actual footprint, and your target install date. With those, a shop can give you a real budget range and a real schedule in about a week. Without them, any number you get is a guess, and guesses on this kind of build run 30% to 40% light.
We fabricate shop-in-shop programs in-house in Manhattan — millwork, metal, finishing, graphics, and lighting integration under one roof, with our own install crews running the overnight. That matters most when the retailer approval comes back with a change three weeks before install and the whole kit needs to be re-cut without adding a week of vendor coordination. The same shop and the same crews handle our stage and scenic fabrication work, and multi-space hospitality builds like Tao Group at the Moxy Hotel, which is why a mid-schedule change stays a shop problem instead of becoming a schedule problem.